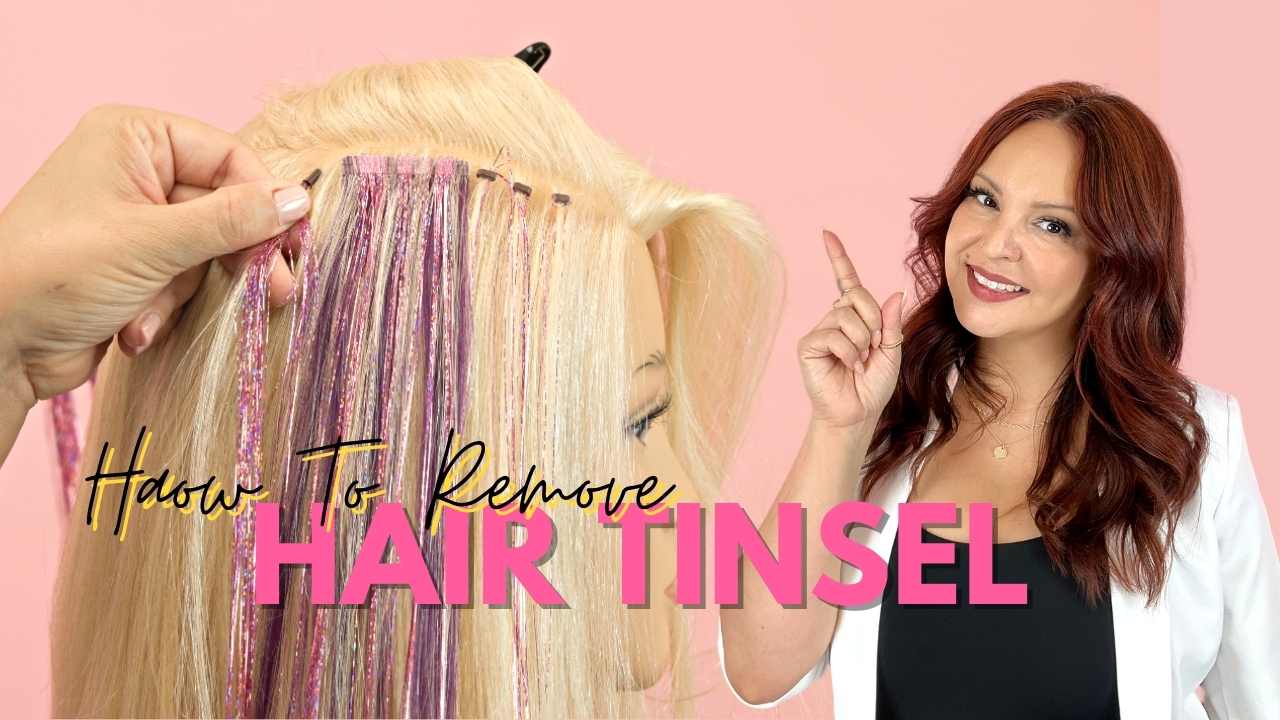
To remove tinsel beads from hair, gently use pliers to loosen the bead and slide it off the hair strand. If you’ve ever had tinsel beads tangled in your hair and wondered how to remove them without causing damage, we’ve got you covered.
Tinsel beads can be a fun and festive addition to your hair, but when it’s time to take them out, it’s important to do so carefully. We’ll provide you with a simple and effective method to remove tinsel beads from your hair without any fuss or hassle.
By following these steps, you’ll be able to safely remove the tinsel beads and restore your hair to its natural state. So, let’s get started and say goodbye to tangled tinsel!
1. The Challenges Of Removing Tinsel Bead Extensions
Tinsel bead extensions have gained popularity due to their unique and sparkling appearance. However, removing these extensions can pose challenges. The potential difficulties arise from the strong bond between the beads and the hair strands. When it comes to removing tinsel bead extensions, it is important to handle them with care to avoid damaging the natural hair.
Additionally, the use of pliers can be helpful in gently loosening the beads from the hair strands. By delicately applying pressure to the beads, they can be gradually removed, one by one. It’s crucial to avoid pulling or tugging forcefully, as this may cause breakage or discomfort.
To ensure a smooth removal process, it is recommended to seek assistance from a professional stylist who has experience with tinsel bead extensions.
2. Step-By-Step Guide For Removing Tinsel Bead From Hair
To remove tinsel beads from your hair, you need to prepare your hair and gather the necessary tools. First, make sure your hair is clean and free of any tangles or knots. Next, gather a pair of pliers and a fine-toothed comb to help with the removal process.
Once you’re ready, follow these steps: 1. Start by locating the tinsel bead closest to your scalp and gently squeeze it with the pliers to loosen it. 2. Use the comb to carefully separate your natural hair from the tinsel bead.
3. Apply a small amount of conditioner or oil to your hair near the bead to make it easier to slide off. 4. Hold the bead with the pliers and gently slide it down the hair shaft, away from your scalp.
5. Repeat this process for each tinsel bead until they are all removed. 6. After removing the beads, wash and condition your hair to ensure it is clean and healthy. By following these steps, you can safely and effectively remove tinsel bead extensions from your hair.
3. Post-Removal Hair Care And Maintenance
After removing tinsel bead extensions, it is important to maintain the health of your hair. Here are some tips for post-removal hair care: 1. Gently comb through your hair to remove any remaining tangles or knots. 2. Use a deep conditioning treatment to restore moisture and nourishment to your hair.
3. Avoid using heat styling tools for a few days to give your hair a break and prevent further damage. 4. Trim any split ends to keep your hair looking healthy and prevent breakage. 5. Protect your hair from the sun and chlorine by wearing a hat or using a leave-in conditioner before swimming.
6. Maintain a healthy diet and drink plenty of water to nourish your hair from within. By following these guidelines, you can keep your hair looking beautiful and maintain its overall health after removing tinsel bead extensions.

Credit: mirellamanelli.com
Frequently Asked Questions Of How To Remove Tinsel Bead From Hair
How Do You Get Fairy Tinsel Out Of Your Hair?
To remove fairy tinsel from your hair, follow these steps for easy removal.
How Do You Remove Hair Tinsel Beads Without Pliers?
To remove hair tinsel beads without pliers, follow these steps: 1. Locate the end of the tinsel bead. 2. Gently slide your fingernail under the bead to loosen it. 3. Slowly pull the bead down the hair strand, being careful not to tug too hard.
4. Continue this process until all the tinsel beads are removed from your hair.
How Long Does Beaded Tinsel Stay In?
Beaded tinsel can stay in your hair for an extended period, but it is recommended to remove it within 4-6 weeks.
How Do You Remove Weft Beads From Hair?
To remove weft beads from hair, follow these steps: 1. Gently squeeze the bead using pliers. 2. Slide the bead down the hair strand. 3. Repeat this process for each bead until all are removed. 4. Avoid pulling or tugging to prevent damage to the hair.
Conclusion
Removing tinsel beads from your hair doesn’t have to be a daunting task. With the right technique, you can easily remove them without causing damage or discomfort. Start by determining the type of tinsel beads you have and gather the necessary tools for removal, such as pliers or a pulling needle.
Carefully work through each tinsel bead, applying gentle pressure to release it from your hair. Take your time and be patient, ensuring you don’t tug or pull on your hair. Once all the tinsel beads are removed, give your hair a good wash and conditioning treatment to revive its natural shine and texture.
Remember, proper removal ensures a seamless transition and minimal hair breakage. So, follow these tips and enjoy a hassle-free experience when removing tinsel beads from your hair! To get more insights and learn about different hairstyles, DIY tricks, and hair care tips, stay connected to reliable sources and keep experimenting with your hair.


